Norfolk ganseys
Charting ganseys
Late Victorian and Edwardian photographs are often superb quality. They are very fine grained emulsions on large glass plate negatives. The photographers were dedicated amateurs or professionals and they knew what they were doing. You can sometimes see every stitch, so charting can be relatively easy. But the 20th century era democratised photography, leaving a legacy of smaller negative sizes and inferior optics, often in the hands of ordinary people unskilled in the finer points of photography. Likewise, some of the very early photographic processes could not produce crisp images, even at the best of times. Often we have to work with inferior evidence in order to get a chart at all.
I began charting by looking at the photographs and accompanying charts in Gladys Thompson's "Patterns for Guernseys, Jerseys and Arans" (Dover softback edition), and began to understand the correspondence between the two. As I became more experienced, I realised that you don't need to see every stitch in order to make a chart with a fair degree of confidence. Here are some of the tricks I use:
Charting tips
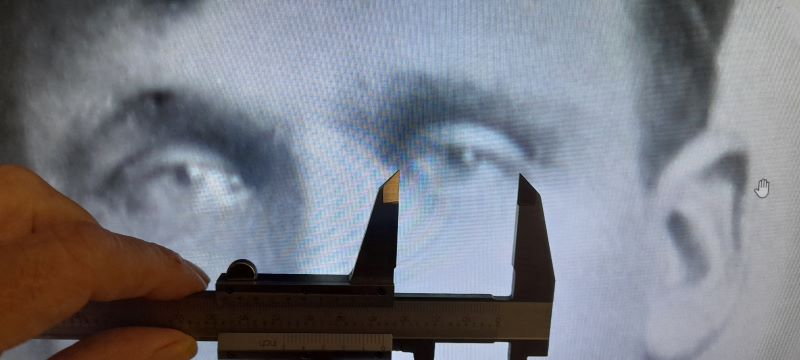
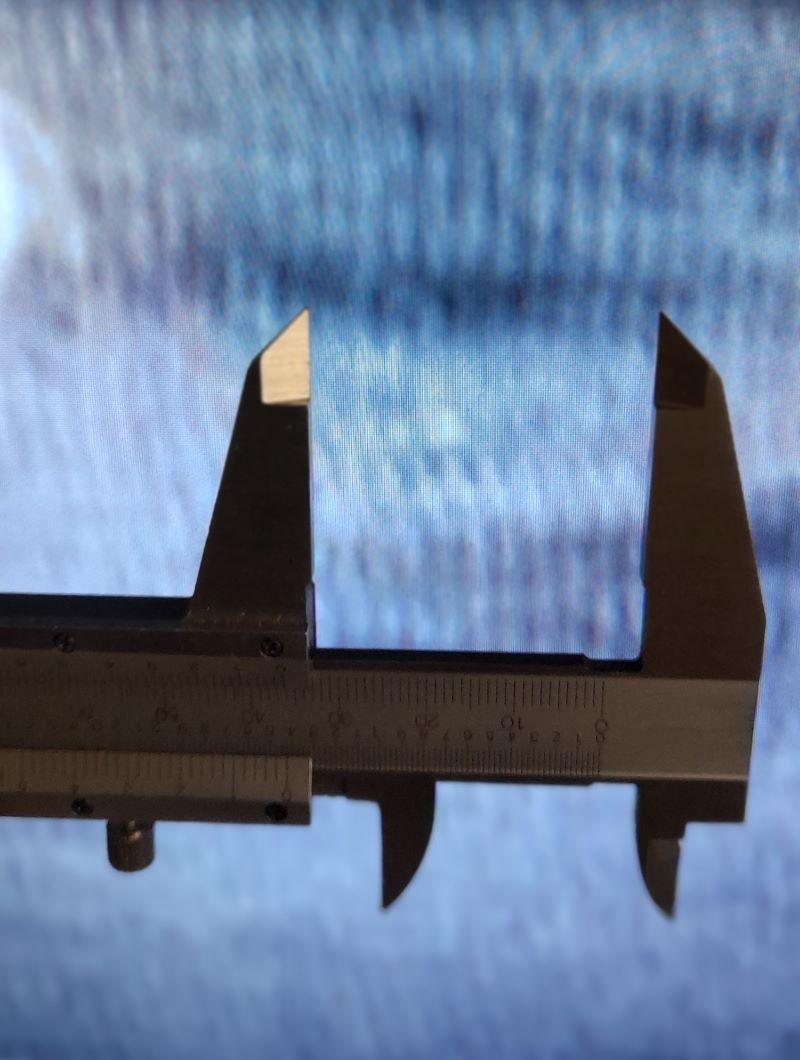
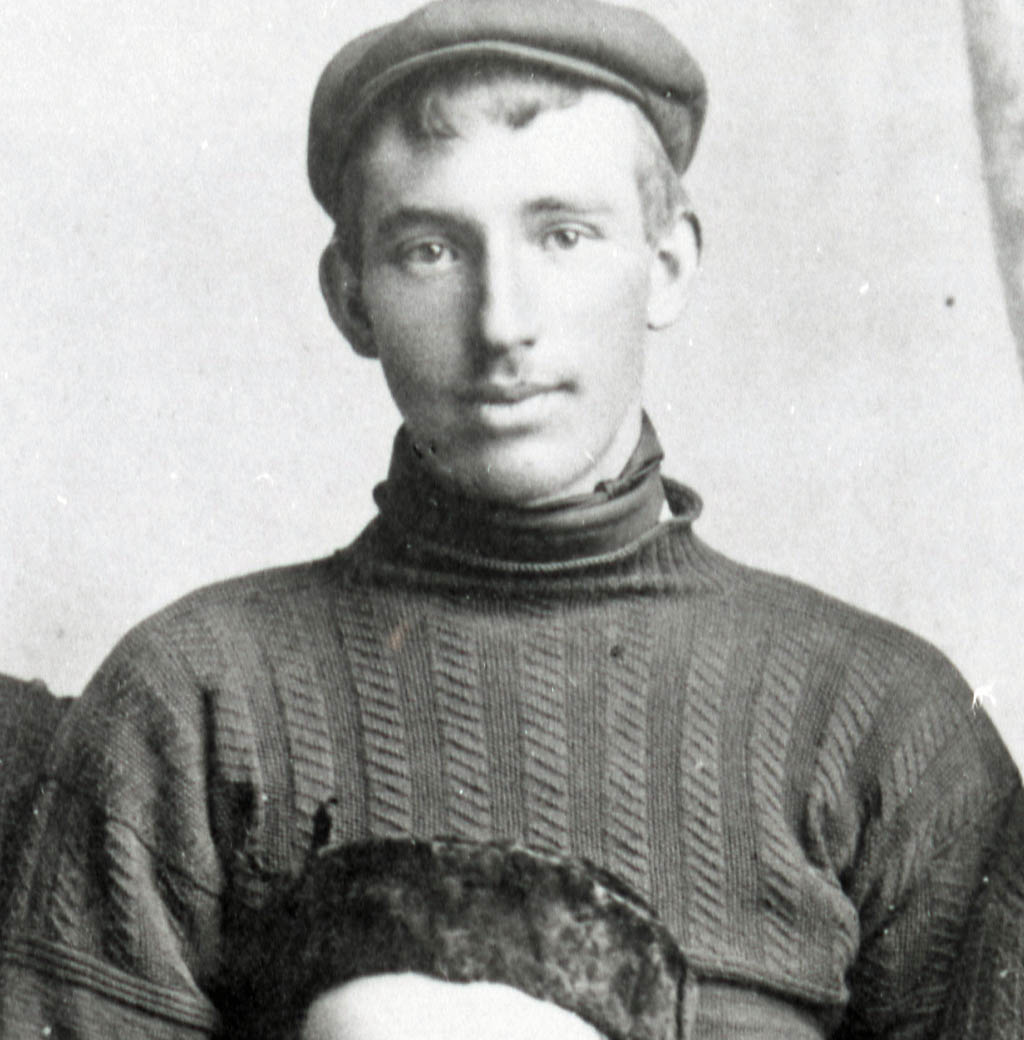
Scale is something you want to get a handle on at an early stage. Is this a fine gansey or a coarse one? There will be no convenient scale set beside the gansey but there are a few clues that you can get from the wearer himself. The human eye for instance is the size it is because the optics work best. Natural selection has created a population whose eyes are really quite uniform in size: the distance across the visible part of the eye, from corner to corner, is just over an inch (27 mm in my case) and that doesn't vary much with age, sex or size of the individual. With the aid of some callipers, this can be used to take a measurement from the eyes down to some plain knitting on the gansey (if possible) and you can read off an approximate tension by counting stitches. Fortunately, the eyes are in the same plane as the belly of the fisherman, so the distance to the lens will be near enough equal. You can do likewise with the diameter of the iris but, being a smaller feature, the accuracy will not be so good. The average iris diameter is 11.6 to 12 mm. If the subject is face-on, you can use the inter-pupillary distance, which averages around 63 mm. However, this is more variable between individuals, so you may want to judge if the eyes are widely- or narrowly-set to compensate.
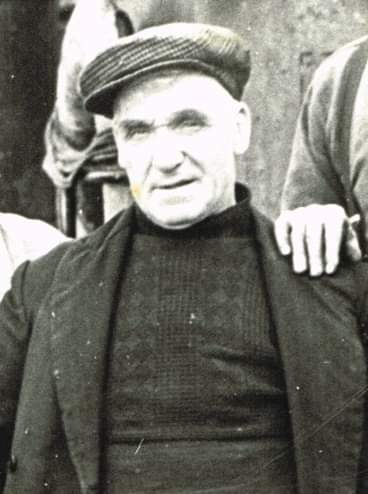
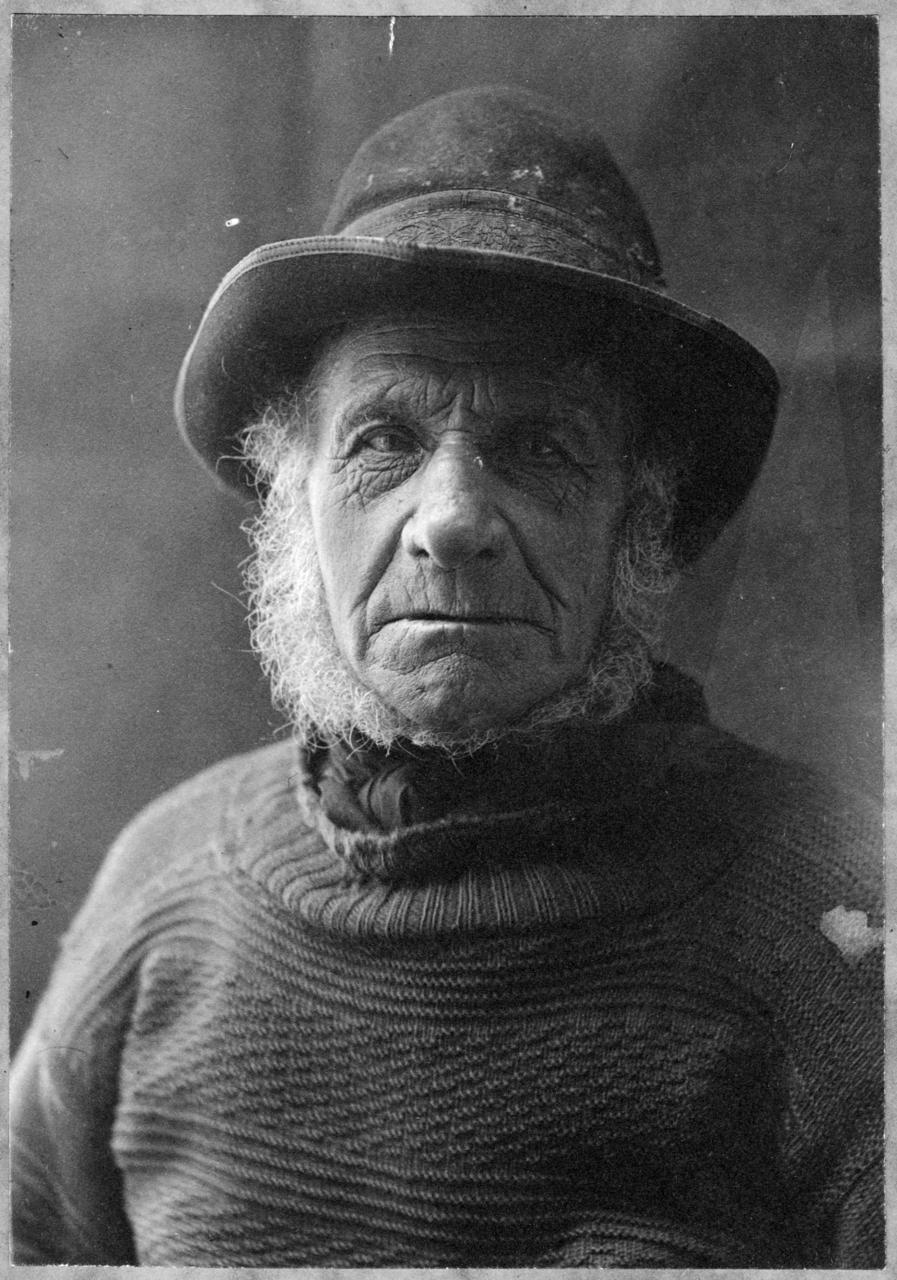
Tension is about 10.5 spi
The size of the first phallange of the thumb (that is, the length from the end of the thumb to the first joint) is a little over one inch in most people. Mine is 34 mm.
For all of these standard measures you can always use your judgement. If, for instance, a fishermen appears to be especially large, or small, you can adjust accordingly. These are only approximations but they are a good starting point and can be used to cross-check other methods of estimating tension.
Standard stitch patterns are very powerful for understanding at least one element (or motif) in a yoke pattern. One motif that I have employed is "Betty Martin", which is a favourite in Norfolk, Yorkshire and elsewhere. Once you can recognise a column of Betty Martin you know you have 6 stitches. Use this as a standard, to compare the widths of other motifs, or simply to count the repetitions if you have a whole field of them and you can add up the number of stitches. I was able to use this technique on GP101, Mabby Brown's gansey in a picture so small you couldn't see the individual stitches.
Above: Mabby Brown's gansey has panels of Betty Martin separating large meshes.
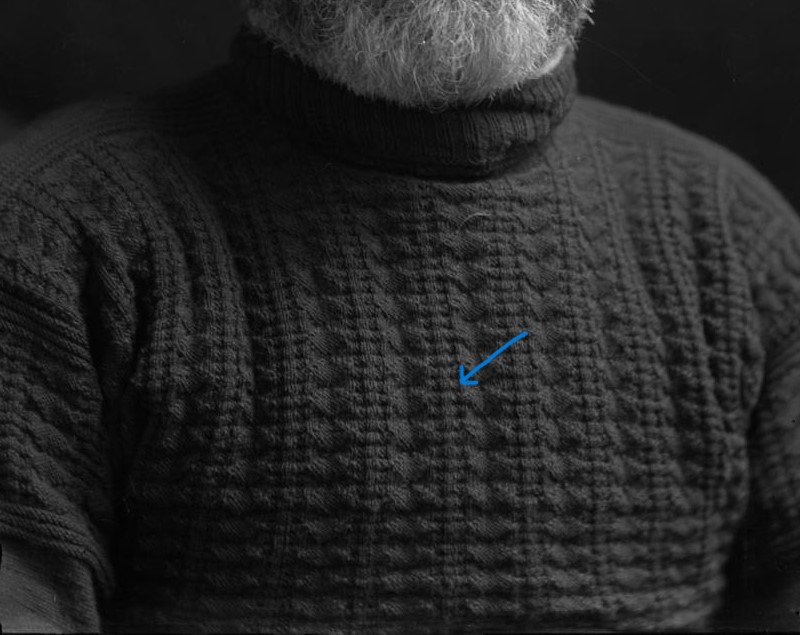
Above: Single columns of Betty Martin (arrowed) are 6 stitches wide.
Above: Scaling this gansey (Buster Long's GP67) was especially difficult from this fuzzy little image but the presence of the columns of Betty Martin provided a known number of stitches (6) from which to gauge the rest of the pattern. This deceptively simple pattern gave us the greatest difficulty of all the ganseys we have charted, needing 19 versions before we got it right.
Seed stitch can be made by a repeat of k2 p2 and then on the next row p2 k2. But it can also be a repeat of k3 p3 with p3 k3. You will notice that this produces diagonal ridges across the panel of seed stitch. The p2 p2 version makes an angle of around 30°, while the k3 p3 goes up at a lower angle, around 25°. I was able to confirm the k2 p2 seed pattern in John Grimes seed and bars pattern (GP75) using a protractor to measure the angle, even though the photograph is so grim that not a stitch is visible.
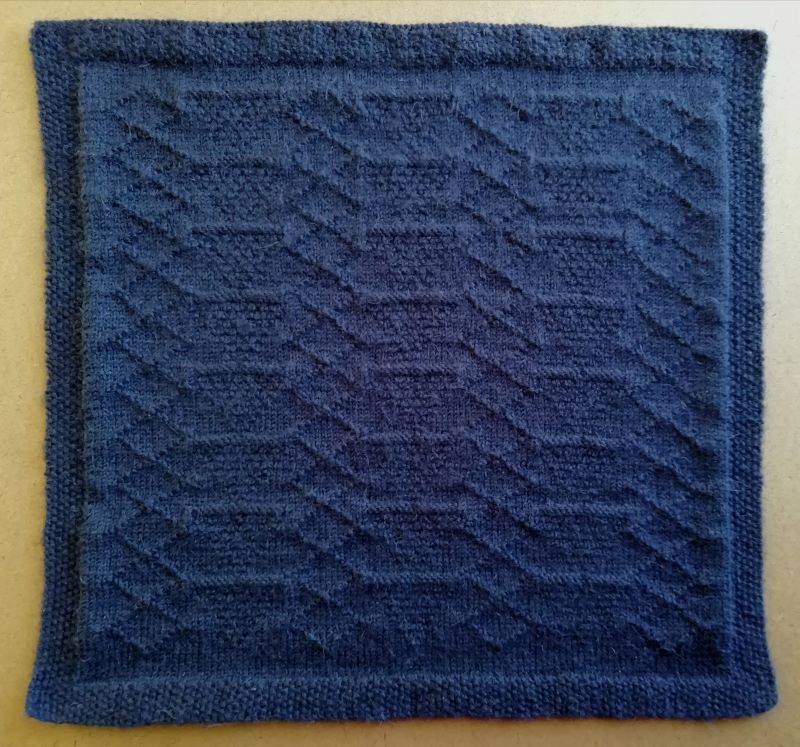
Gilbert Rook's k3 p3 seed stitch.
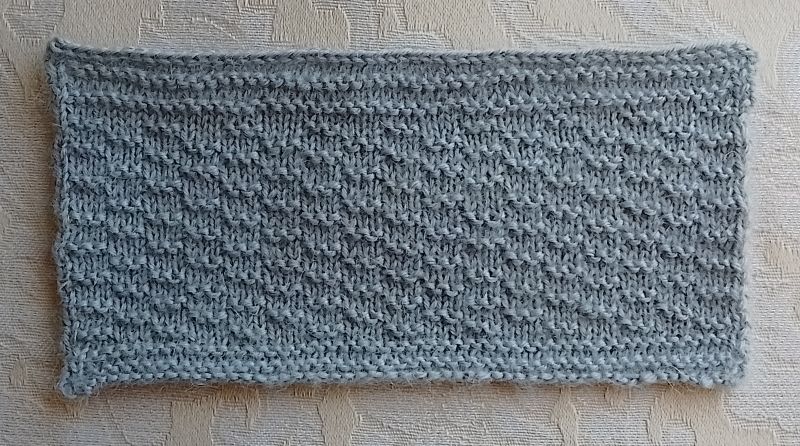
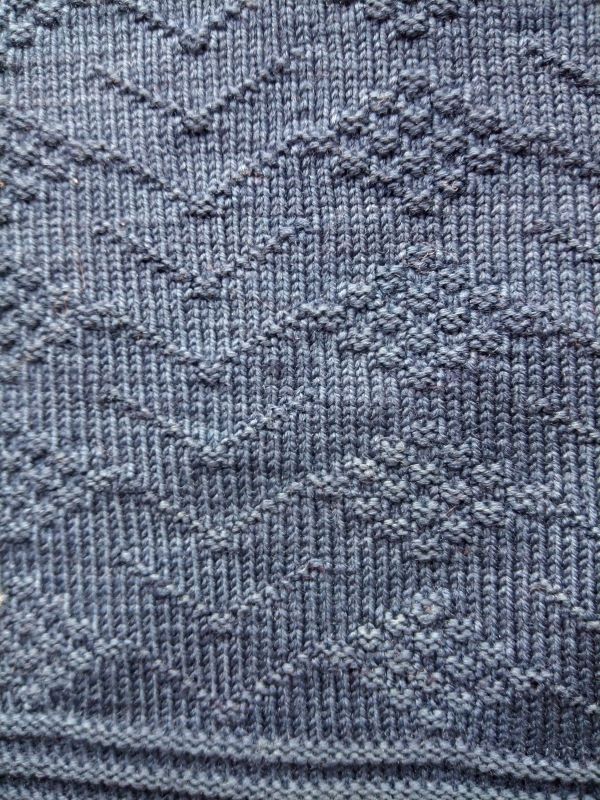
Above: In this sampler of GP31 the diagonal ridges of seed stitch climb at 25° for the k3 p3 version, as opposed to 30° for the k2 p2 version.
"The design [of John Grimes' gansey] is very similar to Gilbert Rook’s (GP31), which is clearer. Gilbert Rook's pattern has seeds made of 3 purl stitches and they align diagonally, rising at an angle of about 25°. Even though the John Grimes’ gansey is very indistinct we can measure the angle of the diagonal alignment at 30°, which is the same as GP4, GP8 and GP71, which are all 2 purl seeds. So, we can be sure that John Grimes’ gansey is a 2 purl version. I estimate that there are 36 diagonal ridges across the chest, each representing 4 stitches, making 288 stitches all round. Add 4 for the seam stitches makes 292. Divide by the estimated chest size of 40 inches (it is loose fitting) and you get a tension of 7.3 spi."
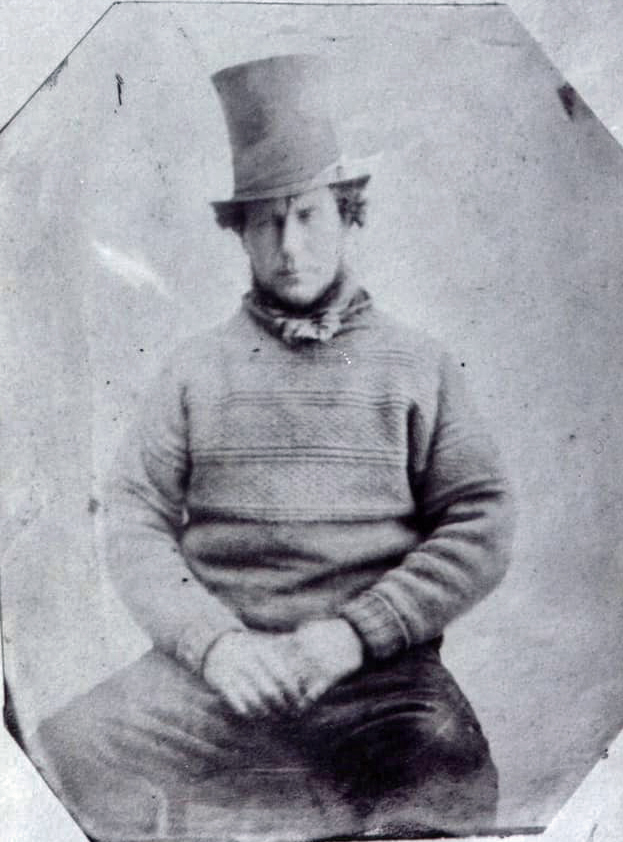
Above: John Grimes, Sheringham fishermen, 1858 (GP75). Despite the faded, grainy image, we can make estimates of the number of stitches and tension and define the nature of the seed stitch panels rising at an angle of 30°.
Ratios of one motif to another are very important. It is more likely that the number of rows in one motif compared to the one adjacent is going to be something rational, like 2:1 or 3:2. For example, in GP39, Esther Nurse's hoop nets and netmask pattern, the ratio of the hoop nets (inverted triangles) to the meshes of the net mask is exactly 2 hoop nets to 3 meshes. Note that they "stay in synch" all the way up the yoke showing that they have a rational relationship. If it were mis-charted in some way then the relationship would gradually off-set from bottom to top and keeping track of the pattern repeats becomes un-necessarily complicated for the knitter. You might not be able to confidently count every row in a photograph (e.g. the illustration fig 85 in Gladys Thopson) but you can see that the motifs stay in synch from the bottom of the photo to the top and that tells you you are on the right track.
Above: Esther Nurse's pattern uses a ratio of 3:2 meshes to hoop nets.
The ratio of the width of one column compared to another should reflect the number of stitches in the chart. For instance, if a column is Betty Martin you can be sure it is 6 stitches and on screen its width is say 20 mm, then a column next to it that is supposed to be 12, or double the number of stitches, should measure 40 mm or double the width, on the screen. If it doesn't, then something is probably wrong with your chart. You can be sure the Betty Martin is 6 stitches so the solution probably lies in the column next to it. You need to consider making an adjustment.
There could of course be exceptions to the rule. In order to avoid a rigid and mechanical appearance to a pattern the clever knitters may have a very big repeat - say 5 of one motif to 7 of another. This means that motifs only occasionally come together while most of the time that are gradually going out of step before coming back into aligment. This is the mark of a subtle designer. GP86, by an anonymous knitter, has a very clever juxtaposition of three motifs with 8 herringbones, 2 chevrons (facing in opposite directions) and 4 meshes make up a repeat of 64 rows.
When it comes to charting the impossible I was particularly pleased to produce a chart of John West's gansey, GP83, which came from a photocopy of a half toned photograph reproduced in a magazine and only a part of the gansey showed where his jacket was unbuttoned. Quoting from the chart text:
"This gansey pattern (John West’s, on the left) was discerned from a halftone image in Norfolk Fair magazine, in an article by Michael Harvey and I have been surprised how much it is possible to surmise from such an unpromising source. In version 1.0 I considered the possibility that the motifs were smaller, just 15 stitches wide instead of 17 but calculations of the size of the gansey based on the visible and estimated pattern repeats made the gansey too small. Comparison of the gansey dimensions against the knuckles and the inter-pupillary distance indicate the width of the columns to be about one and a half inches, which equates to 18 stitches at 12 to the inch. But we know that it wouldn't be 18 stitches to the meshes, which are going to be 17 stitches (one in the centre and eight either side). Counting the visible chevrons and meshes showed a ratio of 3 to 1. I estimate there are 33 chevrons and 11 meshes in the full height of the yoke. This makes the mesh repeats 18 rows high and the chevrons overlap considerably with a new one starting every 6 rows."
Hidden stitches can be very tricky. Stitches can be hidden in the structure of the knitting and only appear if you have the opportunity of examining the gansey in the hand and you can pull the stitches apart. A case in point is arguably the most famous and certainly the most knitted Sheringham gansey - Mrs Bishop's chevrons and meshes GP38. Michael Harvey published this in Gladys Thompson (Dover edition, figs 82 and 83) but unfortunately the chart does not quite correspond with the photograph and so generations of knitters have created gansey patterns that are a little too cramped. If you look very carefully at the stitches between the meshes in the photo you should be able to count 4 rows. Look at the chart and Harvey has only two. Likewise, Harvey charts the chevrons following on immediately above the previous one, whilst in the photograph there is a row in-between. So, the vertical repeat is actually 18 sts but Harvey charts only 16. Try putting a ruler along the rows to guide your eye.
Above: In Mrs Bishop's gansey two extra rows are hidden between the motifs and not shown in the chart published in Gladys Thompson.
Diagonal alignments are a very powerful way of checking that you have the right sized elements. If you find that, say, chevrons in one column line up diagonally with chevrons in the next-but-one column in the gansey then this should also be true in the chart. If not, then something is wrong either in the interval between the chevrons, the size of the chevrons, or the width of the column in-between. Something is wrong so track it down. It is amazing how when you look a second time you see you were wrong and your brain assumed something without really seeing it with your eyes. Going back over charts after a good interval can help you spot errors made first time around. Once again, using a rule to connect across the diagonals will guide your eye.
Above: Do these diagonal bars overlap or does one finish and the next starts on the row above? The image is not clear. But looking at the diagonal alignment shows that the bars in adjacent columns do not quite line up, demonstrating that the diagonals in the columns do overlap by one stitch.
How big is the gansey? When you have completed your chart you can check that it is feasible by counting the number of pattern repeats across the yoke. You will probably have a partial repeat in order the balance the symmetry, so that the pattern under one arm mirrors the pattern at the other end. This is not always the case, as one superb gansey (Jimmy Paris West's GP50) starts and finishes with different motifs, but this is a bit unusual. You may only be able to count half the width of the yoke or may have to estimate the number of repeats near the arms, where the gansey is folded. Do the best that you can, then do the maths and come up with the number of stitches in the whole gansey, including the seam stitches. Is it a ridiculous number, either too many or too few? Remember that many Norfolk (and especially Sheringham) ganseys were small, around 36 inches or less, because the fishermen were sometimes only youths who were yet to fill out. A hundred years ago people were not as well padded as we are today, with our plentiful junk food, riding in cars and relative wealth. Also, Sheringham ganseys were worn quite well fitting and short. Try not to knit a sloppy Joe when you really want a gansey: they should be snug.
Charting paper should ideally have oblong cells, wider than high in a ratio of about 3:2. The reason for this is that knitting is not "square", by which I mean that there are more rows to the inch than there are stitches to the inch. If you use square graph paper then motifs such as meshes are the wrong shape. In fact everything is too tall and doesn't accurately represent the pattern you see on the gansey.
Use black for purl and white (or blank) for knit stitches. The classic book of gansey knitting - Gladys Thompson's "Patterns for Guernseys,Jerseys and Arans" does use charts with rectangular cells, as I recommend above, but then, perversely, uses black infills to represent knit stitches and open white cells for purl. This is counter-intuitive to me as purl stitches on a gansey cast a shadow or recede and appear dark. Then the lazy editors of the paperback Dover edition went and included charts amateurly drawn by Michael Harvey in a different style. These use square graph paper and (to his credit) black for purl, and white (blank) for knit. They should have redrawn them to at least be consistent with the Thompson originals but I suspect they ran out of time, or budget. Don't be caught out!
So, my charts represent, as accurately as I can, what I see in a gansey, or the photograph of a gansey. Remember though they are interpretations, sometimes based on very scruffy evidence and should be treated as "best endeavours". You are welcome to alter them, adapt them, recombine them in any way you wish. My tip when designing your own gansey is to take it easy, don't try to incorporate too many elements - and the kitchen sink! The old ganseys were usually quite simple and minimalist, maybe only 2 motifs or 3, but all the better for that.
Martin Warren
Cromer, 30.9.2023